How do I use SSH?
Category: Manuals
SSH also known as Secure Shell is a protocol that makes it possible to securely manage machines over the Internet. For years it has been the way of choice for managing Unix machines.
A user can simply connect using his username and password. But there is also a solution that is more secure and convenient: authentication using SSH keys.
SSH at Kinamo
As a Managed Service provider, we at Kinamo come into daily contact with management of servers, both internal machines and cloud servers which we manage for our customers. The number of times a server is logged on is almost impossible to keep track of.
It is therefore important that this can always be done in a secure way. This is not always easy since servers often - just like an application or other device - expect a username and password to be entered.
Passing on passwords, providing authentication data to customers, third parties, etc. is a tricky business when it comes to security and is also a weak link in the security chain.
So we would like to share with you what we consider to be a preferred method of authentication on servers we manage!
SSH Access Login Info.
To connect to SSH you need the following information:
- Host: ssh.hosting.kinamo.be
- Username: the same username you use to log into the my.kinamo application.
- Password: the same password you use to log into the my.kinamo application.
- Port:
How to connect to SSH with a username and password on windows
Step 1.
We recommend downloading the free PuTTY client. Because this also includes PuTTYgen. If you want to use SSH keys later, you will need this.
Step 2
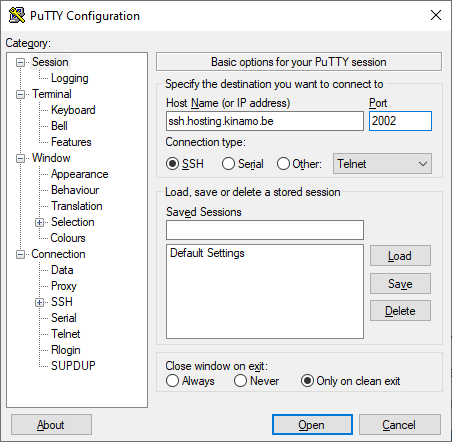
Enter the IP address or domain name of the server in the "Host Name (or IP address)" field. Enter the server's port number in the "Port" field. Select "SSH" as the connection type and click open.
Step 3
If you are connecting to a server for the first time, you will receive a warning about the host key. Proceed and click Accept, with which you trust the host in the future.

Step 4
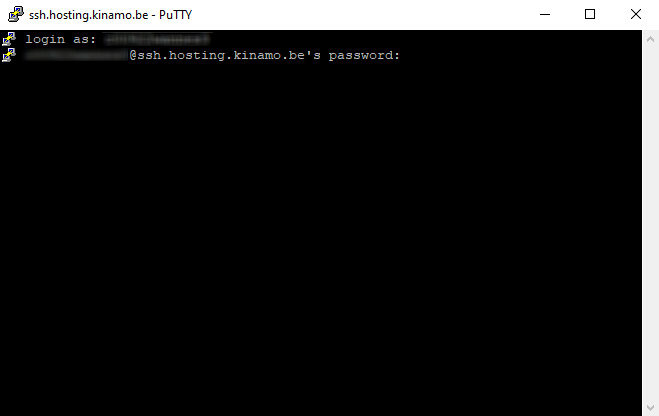
In the terminal screen, enter your Kinamo username and press Enter/Return. After this, enter your password and press Enter/Return again.
Step 5
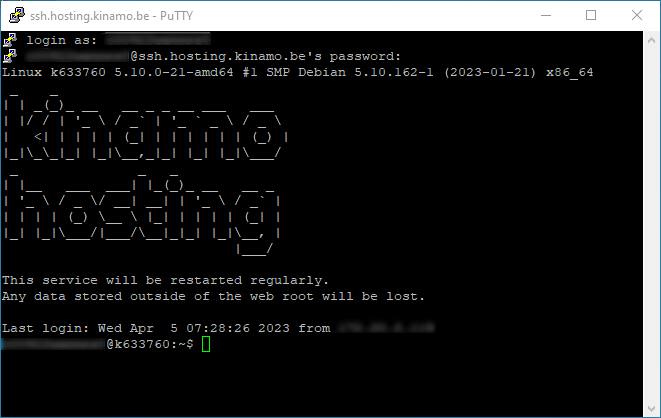
If everything went correctly you are connected to your server!
How to connect to SSH with a username and password on Mac and Linux
Step 1.
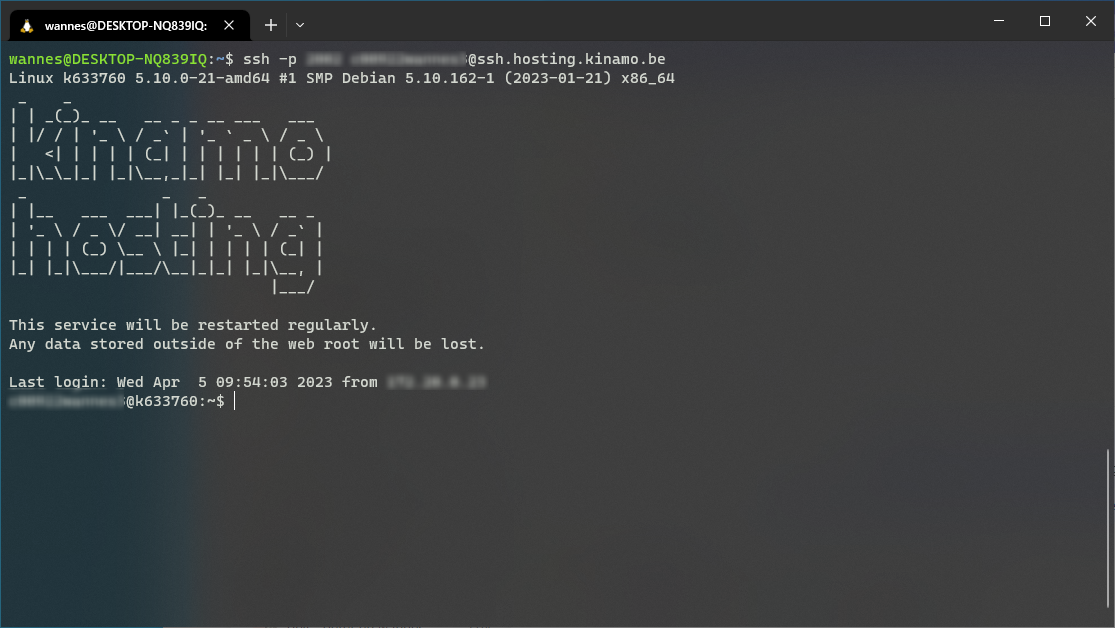
Open your terminal
Step 2
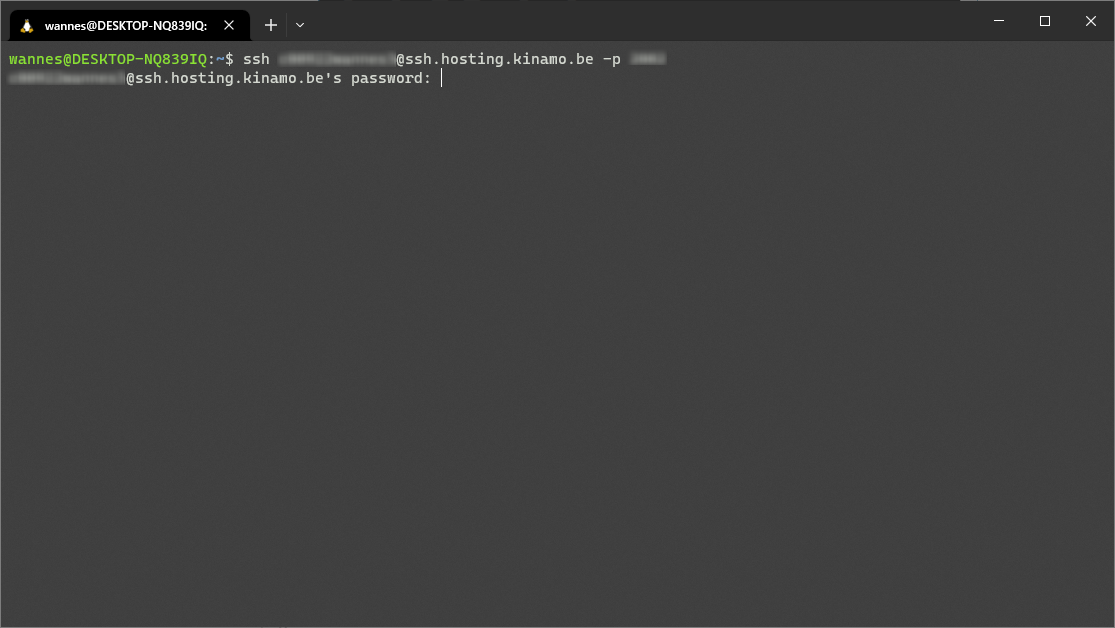
Run this command. Replace the username with your own username and the port number with your own port number.
ssh username@ssh.hosting.kinamo.be -p portnumber
Step 3
Now enter your password and press Enter/Return.
Step 4.
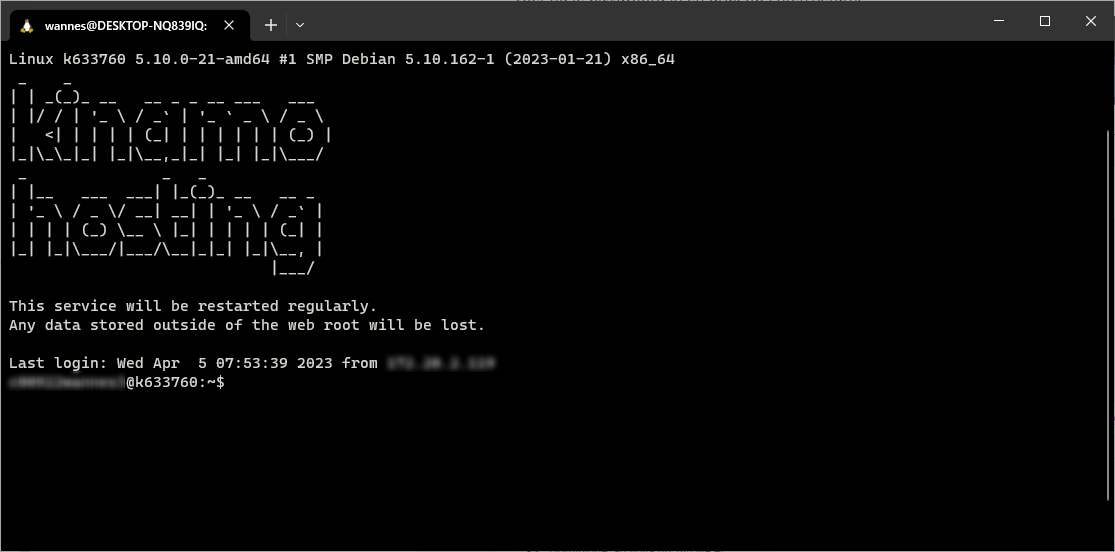
If everything went correctly you are connected to your server!
How to create and use SSH keys.
Another option for connecting to SSH is to generate an SSH key pair. SSH keys provide a more secure way to log in to a server and eliminate the need for a password. You can also further protect your login by adding a password, but this is not required.
The following instructions for Windows are for generating and using your SSH keys with PuTTY. If you want to generate and use the keys directly without PuTTY, you can use the instructions for Mac/Linux instead.
How to generate and use an SSH key pair in Windows using PuTTYgen
Step 1.
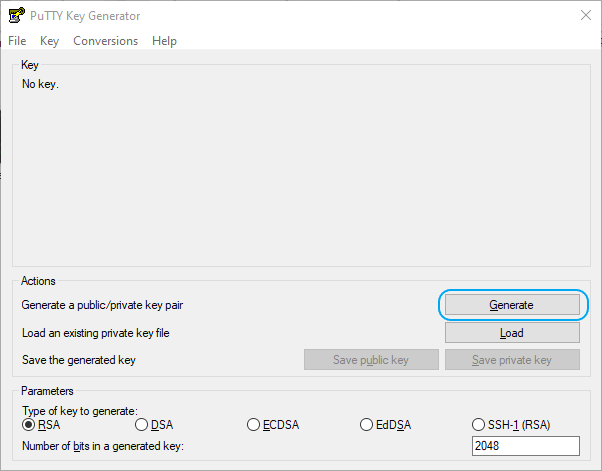
Start the program PuTTYgen, this should be installed together with PuTTY
Step 2
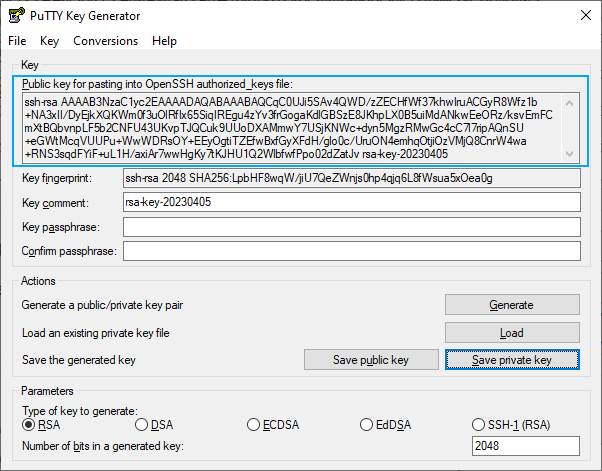
The default parameters should be fine for most configurations. Click on Generate.
Step 3
Move your mouse around the window a bit for some randomness generation.
Step 4
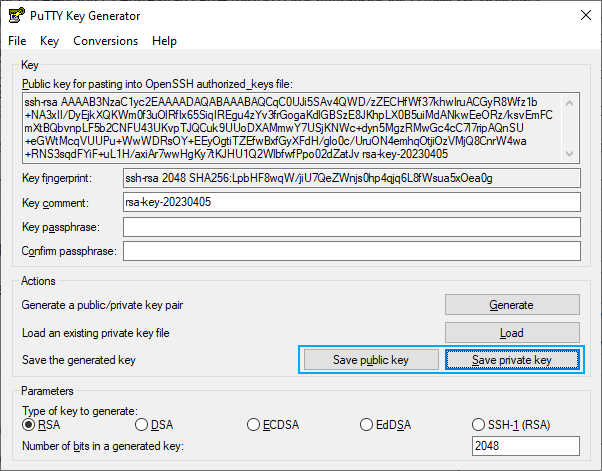
Save your public and private key. Here you can choose a passphrase if you want to secure your private key.
⚠️ Important: Keep your private key secure and never share it with anyone.
Step 5
Keep this window open and connect to your server via PuTTY. If you don't already have a folder for your SSH key on the server, you need to create it now. To do this, use the following command:
mkdir ~/.ssh
This command creates a new folder named ".ssh" in your home folder on the server.
Step 6
Now you need to create an "authorized_keys" file in the ".ssh" folder and paste your public key into it. Follow these steps to do this:
touch ~/.ssh/authorized_keys
If the file already exists, you can skip this command.
Step 7
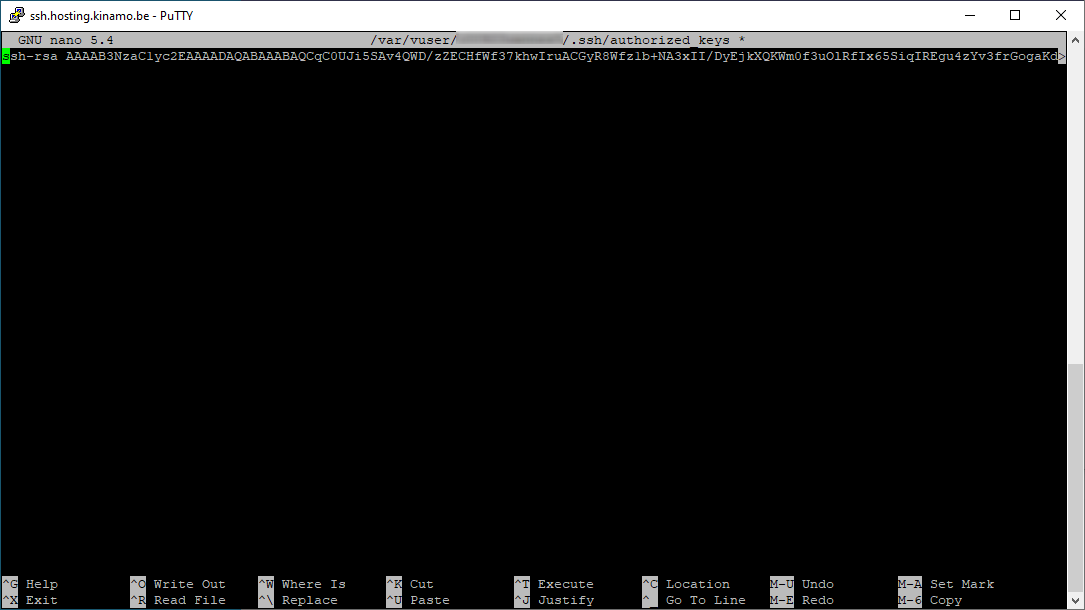
Open this file in your favorite text editor (nano, vim...) for this article we will use nano.
nano ~/.ssh/authorized_keys
Copy and paste your public key from PuTTYgen into this file (crtl+v/right-click).
Save this (ctrl+s → ctrl+x).
Step 8
Now we are going to store our private key in a saved session. Enter the correct info into PuTTY and give it a name. Then press "Save."
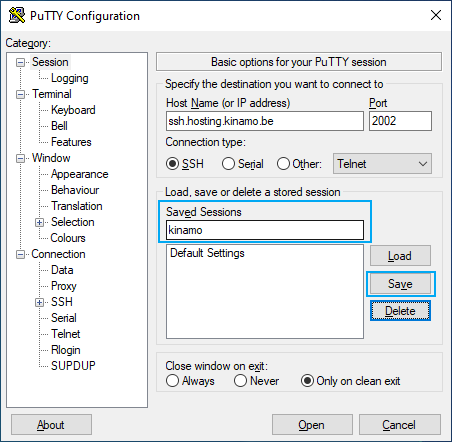
Then click on your newly created session and press "load".
In the left menu navigate to connection → SSH → Auth → Credentials. Here press browse and find the private key you saved (ends with .ppk).
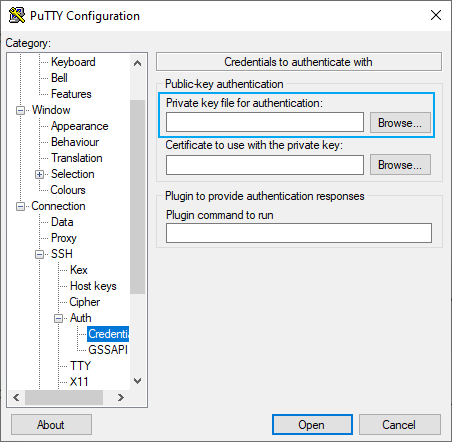
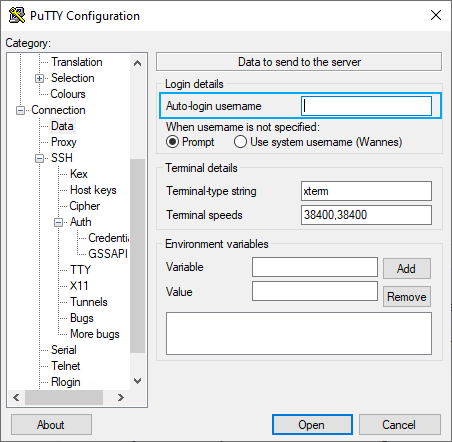
Now you have loaded your private key. Now go to Connection → Data. Here we enter our username under "Auto-login username". This so it automatically uses our username every time.
Step 9
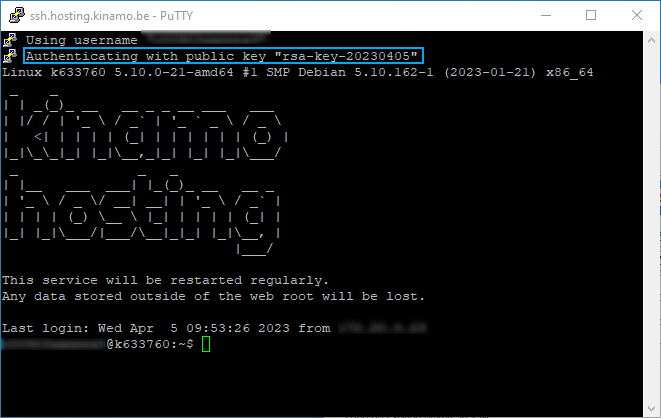
Navigate back to "Session" and press "Save". Now we press "open" If everything is successful we are automatically logged in without a password!
How to generate and use an SSH key pair on Mac and Linux
Step 1.
Open your terminal and run this command. This will create a key-pair.
ssh-keygen -t rsa
Step 2
Choose a location to store your private key. If you leave it blank, it will be stored here:
/home/youruser/.ssh/id_rsa
The public key (.PUB) is created in the same location.
/home/youruser/.ssh/id_rsa.pub
You will then be prompted to choose a passphrase. You can leave it blank if you don't want to use a passphrase.
Step 3
Now we are going to copy the public key to the server. We do this with the command
ssh-copy-id -p @ssh.hosting.kinamo.be
Be sure to replace the port and username.
Now we should be able to log in normally with the command:
ssh -p @ssh.hosting.kinamo.be
Step 4.
Everything worked out and you should be logged in automatically.
