Microsoft IIS 7 - Install SSL Certificate
Category: All about SSL certificates
IIS 7 Microsoft Windows server 2008
Install an SSL Certificate on Microsoft IIS 7 web server
This article shows you how to install an SSL certificate, using the Management Console on Windows 2008 Server. If you didn't generate a certificate request (CSR) yet, and didn't order a certificate, please see IIS 7 SSL Certificate Request Instructions.
Other IIS versions
Detailed instructions for other IIS versions can be found in the following articles:
How do I install an SSL certificate on Microsoft IIS 7?
- Save the certificate you received to the desktop of your Windows 2008 Server.
- Open the IIS console by clicking Start, then opening Administrative Tools, then Internet Information Services (IIS) Manager.
- Click on your server's name in the left pane.
- In the center pane, double-click Server Certificates in the IIS section.
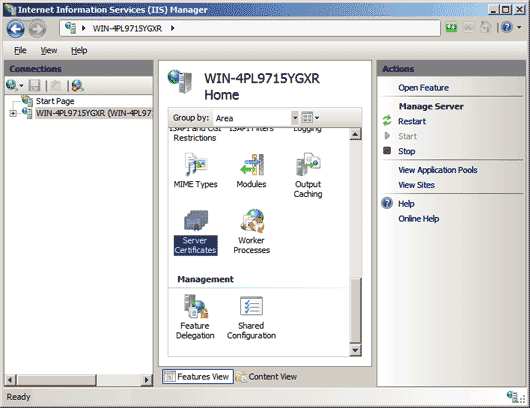
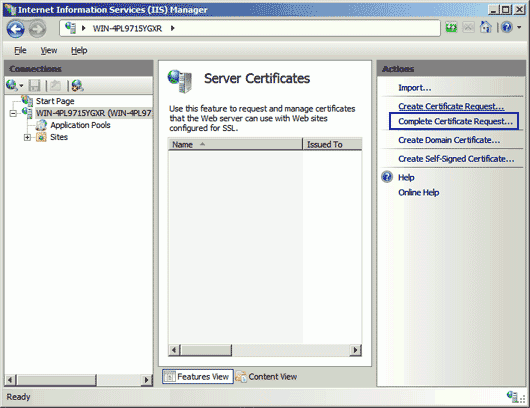
- In the Actions menu in the right pane, click on Complete Certificate Request... to open the Complete Certificate Request Wizard.
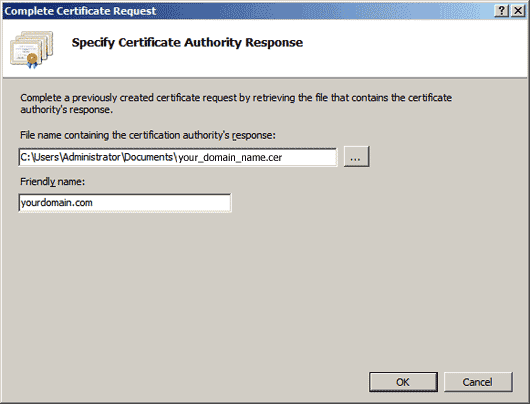
- Browse for the certificate file you just saved to your desktop. Enter a friendly name to identify the certificate with. This name will not be part of the certificate, but serves to identify the certificate for the server administrator. Use the same domain name you used when requesting your certificate. Select the Personal certificate store. Click OK to store the certificate on the server.
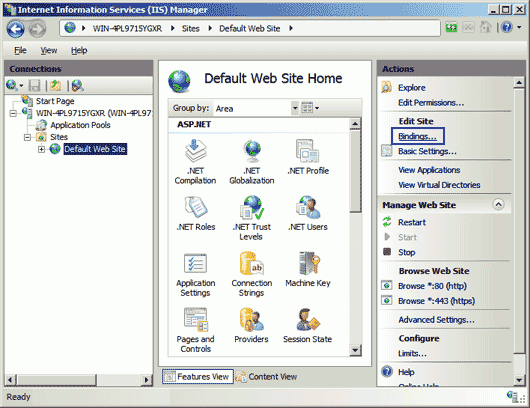
- The certificate is now installed on the server, but must be assigned to a web site in IIS. Click on your server name in the left pane to browse the sites, and select the site you wish to assign the certificate to. In the Actions menu in the right pane, click Bindings... to add a binding.
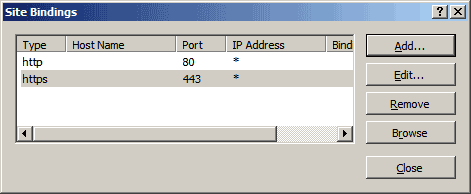
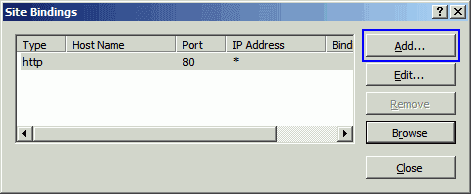
- In the Site Bindings window, click Add... to open the Add Site Binding window.
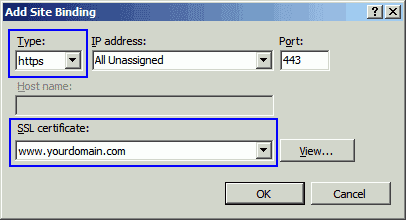
- Select https as type. The IP address should be the one your website is listening on. Alternatively, you can leave the dropdown to All Unassigned. Leave the TCP port to 443, and select the correct certificate from the dropdown.
- The Site Bindings window should now correctly reflect the addition of the certificate, which is now ready to be used by your website. Congratulations!
