Mac Mail: Configuration of the incoming (IMAP) and the outgoing server (SMTP)
Last updated on 28 Sep 2023, 10:32:33.
Category:
Email
Apple IMAP Mac Mail setup SMTP
Follow the steps below to configure your Kinamo e-mail account for the Mac Mail application for OS X, so you can receive your e-mail through IMAP and send through SMTP with the secure SSL connection. Please do not forget to change yourname@yourdomain.be to your own e-mail.
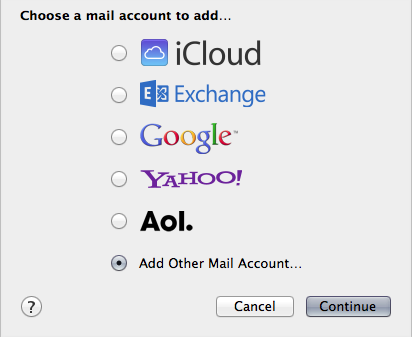
Open Apple Mail. If you haven't allready configured an e-mail account on Apple Mail, you will receive a setup wizard. In this case, choose "Add Other Mail Account..." and click on continue.
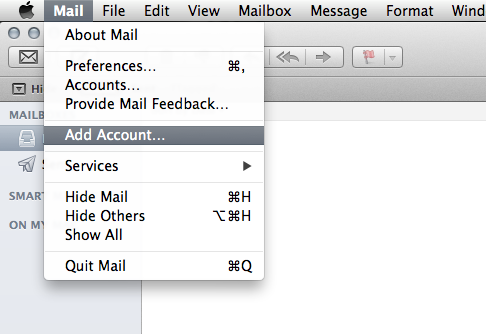
If there is already an account configured in Apple Mail, go to the menu Mail and choose "Add Account" to add an account. If you want to edit your existing account, go to Mail and Preferences.
The Add a Mail Account screen will pop-up.
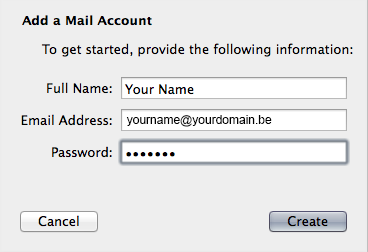
In the input field E-mail Address you fill in the e-mail you are configuring.
In the input field Password you fill in the password of your e-mail
Click Create.
After the standard procedure of Apple Mail with the attempt to fetch configuration, Apple Mail will mention you will have to configure your account manually.
Click Next.
The screen with Incoming Mail Server Info will pop up.

For the Mail Server you fill in our incoming mailserver: in.kinamo.be.
In the input field User Name you have to fill in your full e-mail address (change yourname@yourdomain.be with your own e-mail!).
In the Password Field you fill in the password for the mailbox.
Click Next.
Fill in the Outgoing Mail Server Info details.
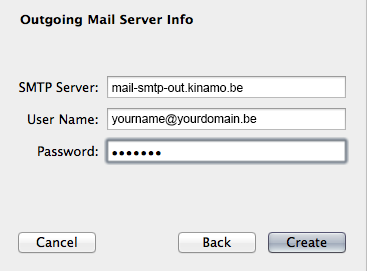
For User Name you have to fill in your full e-mail address (change yourname@yourdomain.be with your own e-mail!).
Fill in the password of your mail in the field Password.
Click on Create.
The account will be created now and the e-mail will show up in your Inbox. The configuration isn't complete yet!
To use the secure connection (required!) you have to follow the next steps
Go to the menu Mail, Preferences.
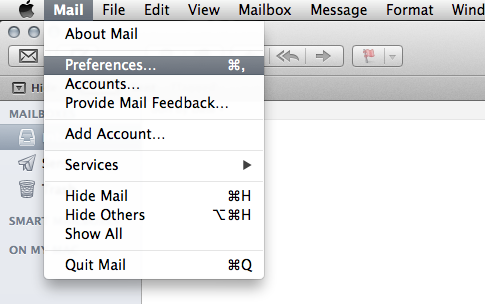
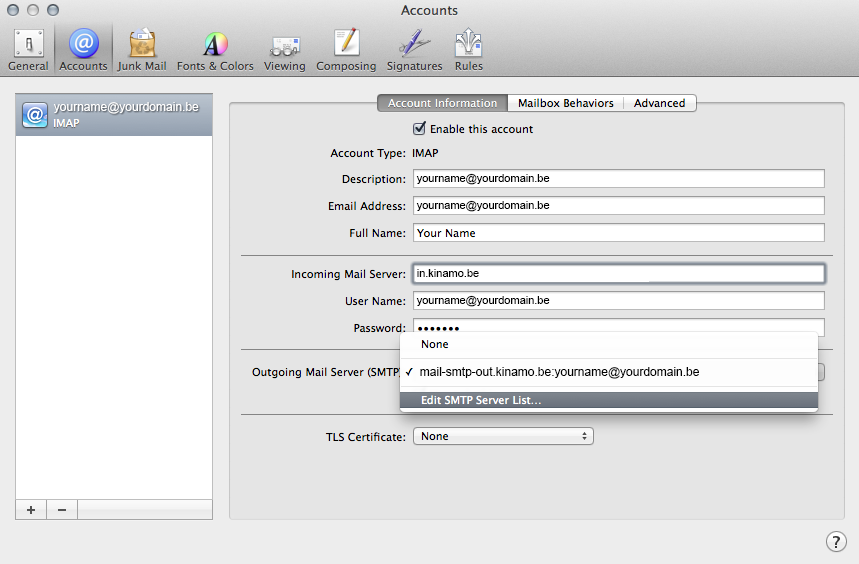
You will see your new account in the tab Accounts. Select the account and choose Edit SMTP Server List in the Outgoing Mail Server (SMTP) dropdown menu.
Click on Advanced.
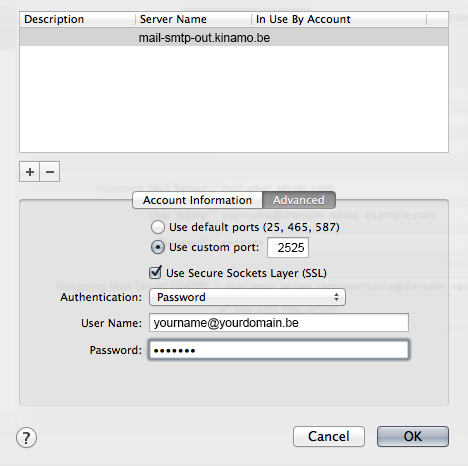
Choos Use Custom Port and fill in 2525.
Be sure that you tick Secure Sockets Layer (SSL).Choose Password in the Authentication and make sure you fill in your full e-mail address in the input field User Name and in the input Field Password you fill in the password of the e-mail. Click on OK.
Next go to the Advanced button in the Accounts screen.

The IMAP Path Prefix must be empty.
Make sure the port is 993 and that you tick the Use SSL checkbox.The option Authentication should be Password.
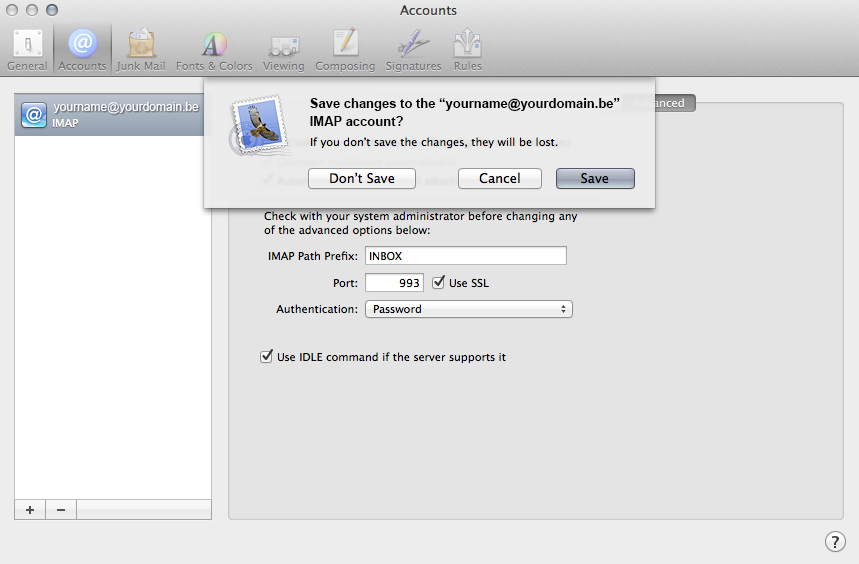
Close the Accounts screen. It is possible that they asked you whether you want to save your configuration. Click on the Save button.